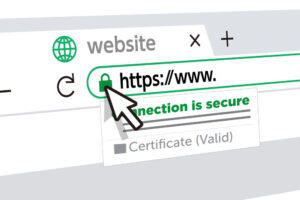
Title: A Beginner’s Guide to Adding an SSL Certificate to Your Website
In today’s digital landscape, security is paramount, especially for websites. One essential aspect of website security is the SSL (Secure Sockets Layer) certificate. It encrypts data transmitted between a user’s browser and the website, ensuring confidentiality and integrity. Not only does it protect sensitive information, but it also boosts your site’s credibility and improves search engine rankings. In this guide, we’ll walk you through the process of adding an SSL certificate to your website.
- Choose the Right SSL Certificate:
- Decide which type of SSL certificate suits your website’s needs. Options include:
- Single Domain: Protects one domain name (e.g., www.example.com).
- Wildcard: Secures a domain and all its subdomains (e.g., blog.example.com, shop.example.com).
- Multi-Domain: Safeguards multiple domain names with one certificate.

- Purchase an SSL Certificate:
- You can buy SSL certificates from reputable Certificate Authorities (CAs) like Let’s Encrypt, Comodo, or DigiCert. Prices and features vary, so compare options before purchasing.
- Generate a Certificate Signing Request (CSR):
- Log in to your web hosting control panel and find the SSL/TLS section.
- Generate a CSR, providing details like your domain name, organization name, and location. Save the CSR file securely.
- Submit CSR and Activate Certificate:
- Once you’ve purchased the SSL certificate, submit your CSR to the CA.
- Follow the CA’s instructions to verify your domain ownership.
- After verification, the CA will issue your SSL certificate.
- Install the SSL Certificate:
- Download the SSL certificate files provided by the CA.
- Log in to your web hosting control panel and navigate to the SSL/TLS section.
- Upload the SSL certificate files or paste the certificate contents into the appropriate fields.
- Install the certificate for your domain.
- Update Website Settings:
- Redirect HTTP to HTTPS: Update your website’s configuration to automatically redirect HTTP requests to HTTPS. This ensures all traffic is encrypted.
- Update Internal Links: Ensure all internal links on your website point to the HTTPS version of your pages.
- Update External Links: If applicable, update any external links or resources (e.g., images, scripts) to use HTTPS.
- Test Your SSL Installation:
- Use online SSL checker tools to verify your SSL installation and configuration.
- Test your website across different browsers and devices to ensure SSL is working correctly.
- Set Up SSL Renewal:
- SSL certificates have expiry dates. Set up automatic renewal to avoid website downtime due to an expired certificate.
- Many hosting providers offer automated SSL renewal services, or you can set up reminders to renew manually.
- Monitor Security:
- Regularly monitor your website for security vulnerabilities.
- Keep your SSL certificate up to date and adhere to best security practices.
By following these steps, you can enhance your website’s security and user trust by adding an SSL certificate. Remember, a secure website not only protects your data but also improves your reputation in the eyes of visitors and search engines. Stay proactive in maintaining your website’s security to ensure a safe browsing experience for your users.
